Lifestylex3
  • Home
  • Blog
  • Featured Guests
  • Life & Family
  • Health & Beauty
  • Recipes

Lifestylex3

  • Home
  • Blog
  • Featured Guests
  • Life & Family
  • Health & Beauty
  • Recipes
Author

Laura

Laura

Asiago Artisan Bread

by Laura September 17, 2020
written by Laura
Print Recipe
Asiago Artisan Bread
Prep Time 2-1/2 to 3 Hours
Cook Time 18-20 Minutes
Servings
Small Loaves
Ingredients
  • 1-3/4 Cups Warm Water (110-120ᵒ)
  • 2-1/4 tsp Active Yeast or 1 Packet
  • 3-1/2 Cups Bread Flour
  • 1-1/2 tsp Salt Kosher
  • 1-1/2 Cups Asiago Cheese Shredded
  • 1 Egg For Egg Wash
Prep Time 2-1/2 to 3 Hours
Cook Time 18-20 Minutes
Servings
Small Loaves
Ingredients
  • 1-3/4 Cups Warm Water (110-120ᵒ)
  • 2-1/4 tsp Active Yeast or 1 Packet
  • 3-1/2 Cups Bread Flour
  • 1-1/2 tsp Salt Kosher
  • 1-1/2 Cups Asiago Cheese Shredded
  • 1 Egg For Egg Wash
Instructions
  1. Combine Water and Yeast in a large bowl. Stir with wooden spoon or Danish whisk. Add half of the flour and stir again. Add remaining flour, salt and half the cheese. The dough will be shaggy. Cover with plastic wrap and tea towel.
  2. Let rise for 1-2 hours. The dough will be very wet and loose. Pour it out onto a well floured surface. Scrape the remaining dough out of the bowl. Divide Dough into 4 pieces with bench scraper or knife.
  3. Pull outer edges to the center and pinch between your fingers. This will create a smooth, round surface on the opposite side. Flip the dough over and place on parchment paper. I use 2 pieces of parchment and cook directly on the paper. Allow space between loaves to rise.
  4. Use a lathe or kitchen scissors to cut and "X" into the top of each loaf. Brush with beaten egg. Sprinkle remaining cheese. Cover with tea towel.
  5. Allow to rise 30 more minutes. Meanwhile preheat oven to 450ᵒ. If you have pizza stones, place parchment paper with loaves directly on top. Otherwise, use baking sheets. Bake for 18-20 minutes until bread is golden.
  6. Allow to cool on cooling rack. Enjoy
September 17, 2020 0 comment
0 FacebookTwitterGoogle +Pinterest
Potato and Cheese Soup

Potato and Cheese Soup

by Laura November 24, 2019
written by Laura
Print Recipe
Potato and Cheese Soup
Simple ingredients come together to make a delicious, hearty soup that will become a family favorite.
Prep Time 20 Minutes
Cook Time 40 Minutes
Servings
Servings
Ingredients
  • 2 Tbsp olive oil
  • 1/2 Cup Celery Chopped
  • 1/2 Cup Carrot Chopped
  • 1/2 Cup onions Chopped
  • 1 tsp kosher salt or to taste
  • 1/4 Cup Flour
  • 2 Cups Chicken or Vegetable Stock Low Sodium
  • 2 Cups milk
  • 2 Cups Potatoes Peeled and Diced
  • 1 Cup Cheddar Cheese Shredded
  • 1/2 Cup Ham or Bacon Chopped, Optional
  • 1/2 Cup Sour Cream or Greek Yogurt Optional
Instructions
  1. Saute Celery, Carrot and Onion in Oil until soft, about 7 minutes. Sprinkle 1 tsp Kosher salt over veggies while cooking.
  2. Sprinkle Flour over veggies and stir 2 minutes. Gradually whisk in broth, then milk.
  3. Add Chopped Potatoes and bring soup to a boil. Reduce heat and simmer until potatoes are tender, 20-30 minutes.
  4. Turn off heat and slowly add the cheese. Stir until melted and smooth. Make sure the soup is not too hot when you add the cheese or it will curdle and separate. Add additional salt, if needed.
  5. Serve soup with additional Cheese, Ham/Bacon and Sour Cream/Greek Yogurt, optional
November 24, 2019 0 comment
2 FacebookTwitterGoogle +Pinterest
Cheese Drop Biscuits

Cheese Drop Biscuits

by Laura November 24, 2019
written by Laura
Print Recipe
Cheese Drop Biscuits
Soft, cheesy pillows of deliciousness packed with extra protein from the Greek yogurt. These are a great accompaniment to any soup.
Course Side Dish
Prep Time 15 Minutes
Cook Time 15 Minutes
Servings
Biscuits
Ingredients
  • 2 cups Flour
  • 1 Tbsp Baking Powder
  • 1/2 tsp Salt
  • 5 Tbsp unsalted butter Cut into small pieces
  • 1 Cup Greek Yogurt Plain
  • 2/3 Cup milk
  • 1 Cup Cheddar Cheese Grated
Course Side Dish
Prep Time 15 Minutes
Cook Time 15 Minutes
Servings
Biscuits
Ingredients
  • 2 cups Flour
  • 1 Tbsp Baking Powder
  • 1/2 tsp Salt
  • 5 Tbsp unsalted butter Cut into small pieces
  • 1 Cup Greek Yogurt Plain
  • 2/3 Cup milk
  • 1 Cup Cheddar Cheese Grated
Instructions
  1. Preheat oven to 450 degrees.
  2. In a large bowl, combine Flour, Baking Powder and Salt.
  3. Add Butter and used a pastry cutter to combine with the dry mixture. You can use your fingers if you don't have a pastry cutter. The mixture should be crumbly with the butter distributed throughout. Add Cheese and mix until distributed evenly.
  4. Combine Greek Yogurt and Milk. I usually do this in a glass measuring cup with a spout so it is easy to pour.
  5. Add Milk mixture to Flour mixture and stir just until combined. It will be sticky.
  6. Use a ice cream scoop (1-1/2 Tbps to 1/4 cup depending on how big you like your biscuits) to make mounds on greased or parchment lined sheet pan.
  7. Bake for 14-15 minutes. We like ours lightly baked so I keep an eye on them around 12 minutes.
  8. Serve warm or room temperature.
November 24, 2019 0 comment
1 FacebookTwitterGoogle +Pinterest
Slow Traveling with Kids
BlogFeatured Guests

Slow Traveling with Kids

by Laura June 17, 2019
written by Laura

Summer is the time that many families travel the most. Honestly, traveling with my family is not my expertise. My friend, Ilham, is here to give you some great ideas to make the most out of traveling with young children. She is a children's book author and mama of 2 living in Toronto.

What is slow travel? I had the same question. It is "a mindset that rejects traditional ideas of tourism and encourages you to soak in your environments and keep yourself open to new experiences".


Do Some Slow Traveling this Year

By: Ilham Alam

Being a parent of two and working full time doesn’t mean that you have to give up on travelling all together or just do resorts or see as many places and as quickly as possible. There is a middle ground.

I make this bold claim as I write this in my vacation rental at a Medellin, Colombia. The kids are asleep, I have a “Club Colombia” beside me and I’m going to watch another episode of Game of Thrones Season 8, before I get to working on my book launch for first picture book, Wonder Walk.

As of the time of writing, we have been in Medellin for 3 weeks and in Colombia for a month, doing “slow travelling”. It basically means instead of taking 10 days and packing it in with as many sight seeing as possible, in as many cities, as possible, thus exhausting yourself at the end; you take the time to stay in one place for the duration of your trip or take a longer trip (if you can) and see maybe 3 places.

Which is what we are doing in Colombia for 7 weeks and we are only going to Bogotá, Medellin, Cartagena and SAN Andres Island.  Instead of taking 7 weeks to travel between 3 countries.

I highly recommend slow travelling when you have young children, as it’s less stress on them with not dealing with a new place and routine every few days and less physically demanding on them. Thus, easier on you too.

Also, slow travelling ends up becoming cheaper, because it’s “economies of scale”- the longer you stay in a place, the more you get to know the cheap, local joints and free activities to do and navigating the city by foot or by transit. Moreover, we only stay in Airbnb, in order to provide a home environment with home cooking for our kids (yep cooking & eating at your Airbnb also cuts your cost); and the longer you stay in an Airbnb, the cheaper the host makes your stay.

All of the above factors into our decision when planning an epic family trip. And since we plan to stay in a place for sometime, we also research the living costs of a place. We have yet to visit London, England, for example, as the living costs are very high. However, this accounting of living costs has allowed us to visit countries where it’s still a bit of a hidden gem & where not many Western tourists take their children, which we have loved! And having Aeroplan Points and TD VISA Expedia certainly has helped in paying for travelling.

And you must be wondering: well

You must lug around 4 large suitcases along with carry on bags for your family of 4, right? Not at all! We just take 1 checked luggage in total and carry-on bags. Also, since we have a baby, I’m allowed an extra allowance of a diaper bag with baby essentials including baby food & snacks.

As for clothes, well, it’s minimalism all the way. 3-4 shirts each, same number of shorts/pants and two dresses for me, 2 pairs of shoes (and however many underwear you think you need for your sanity). When abroad, I don’t wear much jewelry, as I don’t want to advertise that I’m a “rich foreigner” when out and about in a country that still has a high degree of poverty, such as Colombia. And you can launder and wash as you go (we try to find Airbnb with a washing machine on site).

So that’s it everyone! These are my tips and personal experience with a different kind of travelling with kids. To follow along my Colombia adventures, you can find me on Instagram: @storymummy86 or my blog: storymummy.com

June 17, 2019 0 comment
1 FacebookTwitterGoogle +Pinterest
BlogLife & FamilyUncategorized

Raising Decent Human Beings

by Laura April 29, 2019
written by Laura

Since becoming a mom, I believe that one of my biggest jobs is to raise decent human beings that grow up to be contributing members of society. Important characteristics on my list that I expect are: being polite and kind to (almost) everyone, having responsibilities, being able to speak to anyone, and taking care of our earth. The number one way of teaching all these things are to do them myself and be a great role model.

Manners and Kindness

I refuse for my kids to ever be a bully or “mean girl”. They will be the one who takes the new kid in school under their wing or comforts a friend when someone else hasn’t been so nice. From a very young age, we have taught kindness, grace and manners towards everyone, including ourselves. Our family is fortunate that our kids have the opportunity to be in a diverse school and are exposed to kids different from themselves.

We all know and should teach kids about “Stranger Danger” and that is my exception for kindness and manners. They still look to me for permission to speak to a stranger who has first spoken to them.

At a certain age, manners were not only encouraged, but expected. It is easy to get out of the habit of good manners, even for adults, so this is always a work in progress. The hardest one for the kiddos these days is interrupting.

Responsibility

So many days I find myself picking up after the kids or doing one of their chores for them. I must stop myself and back up. It is way easier to do it myself, but it is not teaching them anything. They do have daily chores. The older kids have more, but all three of them are expected to make their bed daily, pick up after themselves and get their belongings out of the car.  The last one seems to be the hardest for them. Somehow, they seem to produce trash when riding in my car even on the shortest trip. It boggles my mind!

Ease of Conversation

My husband and I are naturally shy people. It wasn’t until adulthood that we could have a conversation with anyone and everyone. It is still not the easiest things for me, but I no longer have huge anxiety meeting and talking to new people. This is not something that I would like to be mastered by the kiddos at a young age to make it easier for them in the long run. We constantly put them in situations for them to grow in this area.

Taking Care of our Earth

Being good to Mother Earth is always a work in progress as we learn more and more.  My kids would never even think about littering, it has been instilled since birth as has recycling. We are all working on wasting less electricity by turning off lights and being conscious of running water. So many toxic chemicals have been cleaned out of our home that will no longer go into the water system or our body and hopefully never to return.

There is always room for improvement. I am not a perfect mom and I don’t have perfect kids. We all do the best that we can. While everything ebbs and flows, I will continue with my goal. What is important to you that you teach your kids? What are your best teaching tools?

April 29, 2019 1 comment
0 FacebookTwitterGoogle +Pinterest
How Does Your Garden Grow?
BlogLife & Family

How Does Your Garden Grow?

by Laura April 8, 2019
written by Laura

Do you have a garden? If so, I would love to hear your best tips. If not, you can learn along with me.

Growing up, the majority of our vegetables came from my grandparents’ garden.  We ate the very best tasting tomatoes, the sweetest corn and yummiest green beans among other things. My grandparents with a huge garden would provide veggies for the entire family and it was a yearly event to “process” the harvest. Instead of shopping at the store we would go to the pantry for the jars of some of the goodness or freezer for other goodness.

It wasn’t until I was an adult, shopping for my own food that I realized how lucky I was to have access to the homegrown food. It has been a process of trial and error to find and cook the vegetables that taste like what I remember as a kid.

For years I have dreamed about growing my family’s vegetables in my own garden. I decided that this would be the year. The kids are old enough to be involved.

We started some seeds in the house a few weeks ago. Bella has been taken responsibility for making sure they are thriving. Unfortunately, this hasn’t been as successful as we wanted. Maybe next year we will try to start the plants as seeds again.

Although we live in a pretty urban area, we are surrounded my wildlife. There is a nice sized herd of deer that visit us daily and LOVE fresh veggies... really anything that is edible. We also have a ton of squirrels and chipmunks (until the snakes appear) who also destroy crops.

I’ve been researching raised gardens and decided on using pallets with a “cage” this year for our garden. Creating the garden from the pallets is a pretty easy project and creates perfect rows for our veggies. The pallets I found needed a little modification. We used a crowbar to remove every other slat to give enough space for our plants.


The landscape fabric was the strongest that I could find to hold the soil in and weeds out. I used a staple gun to attach the fabric on the back and sides of the pallet. I’m definitely not the expert on soil, but we used a combination of top soil, conditioner and a manure mix.

As far as the protection from our wildlife pets go, we build a cage from 1x2’s, 1x3’s and chicken wire. David took care of the cage construction and I took care of the chicken wire. Because being stabbed with a wire is not something I look forward to, I took care to bend and twist each of the cut wires.

Our first pallet garden
Side view of the cage
Top view with the cage
The twisted chicken wire

To get the kids involved the initial part of the garden, I had them each decorate a clay pot for our herbs. While they loved this project, my time involvement was way bigger than theirs. It was like when you plan and cook a huge feast and it takes your family 15 minutes to eat it. Haha! They turned out great… almost exactly what I envisioned.

My middle babe loves painting
So does my little guy
David even created a masterpiece

I’ll give you progress updates on our adventure.

If you want specific instructions on any of these projects, feel free to reach out to me!

April 8, 2019 0 comment
0 FacebookTwitterGoogle +Pinterest
Be Good to Your Skin
Health & BeautyLife & Family

Be Good to Your Skin

by Laura March 28, 2019
written by Laura

With spring break and then summer break is right around the corner, we are talking sunscreen.  Like most things, not all sunscreens are created equal. It is easy to go with the most known brands or the most convenient for application, but I want you to think twice about your choices. I am sharing what I use (not affiliated links) for my family at the end. As always, the most important thing is to protect your skin. I would rather you go with a little less healthy sunscreen than no sunscreen at all!!

Have you been good to your skin?

How good were you to your skin when you were younger?  Did you use sunscreen every time you went outside?  Did you occasionally let your precious skin get too much sun?  I will admit that I didn’t always take care of my skin. I can even remember a couple of times when I was in severe pain from not protecting it from the sun. This is the first time I have publicly admitted it, but I spent a little time in the tanning bed earlier in life and before our wedding.

I did know better and I was taught better, but I couldn’t think that far into my future.  Unfortunately, these decisions started catching up to me in my 20’s. Every time I go to the dermatologist for a yearly skin exam I have at least one atypical mole removed. I have even had a Basal Cell Carcinoma removed from my back, which left an ugly scar! At this point, I don’t what I dread more, my yearly lady doc or dermatologist checkup.

What really hits home is that most of the spots taken off have been in places my bathing suit covers so I know that it was the tanning bed visits that will continue to plague me!

Choosing to do better

I do enjoy being tan…not that my skin gets that tan, but I like having a little color.

Swimming in the Jungle
Snorkeling in a cenote
After a day in the Mexican Sun. Riviera Maya 2018

On my journey to be healthier I knew that sunscreen had to be addressed. Before David and I took our trip to Mexico last year, I consulted my holistic health coach about the best sunscreen. Not only did I want product that was safe for us, but also the water and creatures that Mexico is trying to protect.

This is when I discovered the Environmental Working Group (EWG). It is a non-profit organization which rates products on their toxicity level. You can use their website to research products, but I like the convenience of the app.  It is my go-to before I purchase a product to go on my skin or on my body. This has been a huge eye-opening resource.

A big disappointment is the toxicity of the aerosol sunscreens. They are oh so convenient to slather the kids with sunscreen, but not so great for their little bodies.

I was on a search for a very convenient, safer sunscreen for my family and came across one from my favorite brand, Alba Botanica. It is aerosol-free and 100% vegetarian with no parabens and is biodegradable. It is not the cleanest, but it is cleaner than other spray sunscreens out there.

This is what I decided to have in my arsenal:

Thinkbaby cream and face stick, Aveeno Baby Face stick, Beautycounter Protect All Over Sunscreen, Alba Botanica Facial Sunscreen, Alba Botanica Sport Mineral Sunscreen and Badger Sunscreen Lip Balm. All of these are in the featured picture.

March 28, 2019 1 comment
1 FacebookTwitterGoogle +Pinterest
Spring Cleaning for your Face
Health & Beauty

Spring Cleaning for your Face

by Laura March 18, 2019
written by Laura

Heads up: This post contains affiliate links. If you buy something through one of the links, you won’t pay a penny more, but I’ll get a commission, which keeps the tips flowing your way. Thanks!

It seems like it has been raining the majority of the winter here in Georgia. The weather combined with trying out new makeup has left my skin feeling a little dull. It's time for a little spring cleaning for my face. I will share a couple of my go to healthy refresh regimens for my face. One is a daily vitamin C serum and the other is a homemade, natural exfoliator.

Daily Vitamin C

Everyone knows how great Vitamin C is for the inside of your body. It helps boost your immune system, maintain your bones and teeth, but did you know that it also helps with wound healing and collagen production?   With the reduction of collagen, we see fine lines and wrinkles. By applying Vitamin C, or ascorbic acid, directly on your skin you get the direct benefits of the increased collagen and neutralization of free radicals in the skin. So, what exactly can Vitamin C do for your skin?

  • Acts as a powerful anti-oxidant
  • Boosts collagen
  • Treats photo damage
  • Brightens and smooths skin

Mix & C Serum from The Retro Company has become my very favorite skin care product. Why is this product different? First, it is plant based. Second, is the technology behind the packaging. The 100% Vitamin C is separated from the hyaluronic acid serum. Not until you pop the membrane will the vitamin C touch the serum. Because of this technology, you are getting the freshest Vitamin C serum available. This is because once Vitamin C is oxidized it loses its effectiveness. When it turns dark orange Vitamin C should be discarded. Hyaluronic acid it the other amazing ingredient in the serum. It pulls moisture from the air into your skin.

Homemade Exfoliator

Everyone needs a great exfoliator. Personally, I don’t like the gritty exfoliators on my face. They are great on the rest of my body, but I prefer enzyme exfoliators on my face. Some examples of natural enzyme exfoliators are apple cider vinegar, pineapple and papaya. The enzymes dissolve the “glue” that holds the dead skin cells. The fruit enzymes are great for sensitive skin, but always test an area first.

This week I needed a deeper cleanse, so I used a combination of:

  • Apple cider vinegar – breakdown the “glue”, fight recent breakouts and to balance skin
  • Baking soda – exfoliate, reduce sebum, increase circulation
  • Lemon juice – tone skin and kill bacteria
  • Honey – moisturize


How to make it:

1-1/2 Tablespoon Baking Soda

1 Teaspoon Honey (I prefer organic, raw honey)

1 Teaspoon Apple Cider Vinegar (organic with “mother”)

1 Teaspoon Lemon Juice

Mix the baking soda and honey into a paste. Slowly mix in the apple cider vinegar and lemon juice. It will bubble.  Use a brush (I use a silicone or foundation brush) to apply the paste to your CLEAN face. Keep on your face 5-7 minutes. It will not dry because of the honey. Rinse with warm water. Apply moisturizer.

My face immediately feels softer, smoother and cleaner. The next day is even better!

IMG_9656.1
IMG_9657
IMG_9658
March 18, 2019 0 comment
0 FacebookTwitterGoogle +Pinterest
Love of an Irish Woman
Life & Family

Love of an Irish Woman

by Laura March 11, 2019
written by Laura

This week’s blog is a tribute to my sweet St. Patrick’s Day loving grandmother. I am also sharing the recipes on my take on Corn Beef and Cabbage.

In middle school I had a project about the 1930’s and had to create a newspaper with a handful of articles. I remember wanting to interview my Gramps for one of the articles. Fortunately (and unfortunately) he was on a trip when it was time to do the interview and my grandmother, MaMarie, asked why I couldn’t interview her instead.  The conversation with her opened my eyes to the incredibly amazing woman that she is. Growing up my cousins and I always idolized Gramps and don’t think we gave Mamarie the credit that she deserved. She is one of the strongest women that I have ever known with 94 years of wisdom. Who can beat that?

And she has some great hair and skin. Please pass those genes to me!

Mamarie is an Irish farm girl from Maryland. She grew up as the oldest of 4 with very little conveniences. She has told me stories of having to use the outhouse in the middle of the night during the Maryland winter, learning how to drive a stick shift truck in the middle of a field and giving birth to my 10-pound father at home in August! She supported my grandfather during WWII and the rest of his entire life. Talk about a dedicated woman! She has been the glue for our family since the 1940’s.

As I get older, I can appreciate our similarities more and more. She is a Renaissance woman and when I was younger, I don’t remember her needing much help with anything. With all her talents, abilities and hard work, her hair and makeup are always perfect. Unless you catch her in the garden, you will not see MaMarie without high heels or pearls. One big difference between us is her magical green thumb. She can grow anything and loves being outside. As a young adult, she would give me plants and ask that I bring back the pots after I kill the plants, LOL!

with Bella
with David Peyton
with Jaxon

Besides holding all my babies for the first time, my favorite memory of her as an adult is her dancing at my wedding…nonstop…all night.

MaMarie and my dad dancing at my wedding
Swing dancing with my cuz and minister
Conga!!

Before the family grew exponentially, she would send cards to us for every holiday. St. Patrick’s Day is her favorite holiday so there was always something extra in that card. She also loves her Corned beef with cabbage, so I am going to share my take on it with you.  It is not authentic and I’m aware of that. I cook for my family’s taste.

Corned Beef and Cabbage with Mashed Potatoes


Find my recipes here:

Corned Beef

Steamed Cabbage

Creamy Mashed Potatoes

March 11, 2019 0 comment
0 FacebookTwitterGoogle +Pinterest
Creamy Mashed Potatoes
Recipes

Creamy Mashed Potatoes

by Laura March 10, 2019
written by Laura


Print Recipe


Creamy Mashed Potatoes

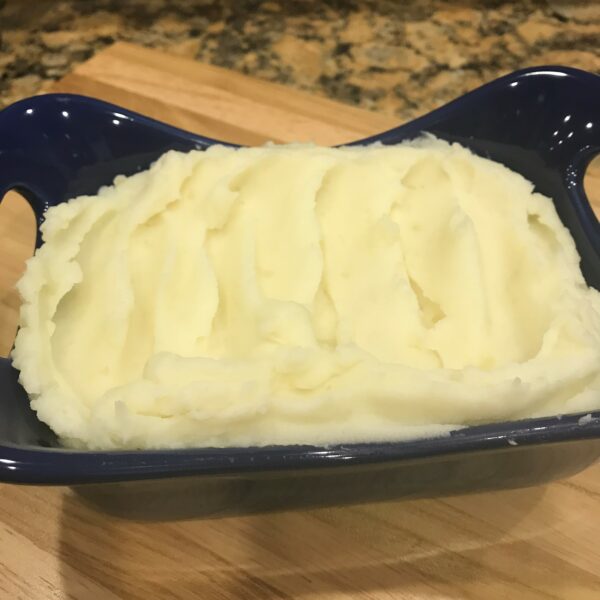
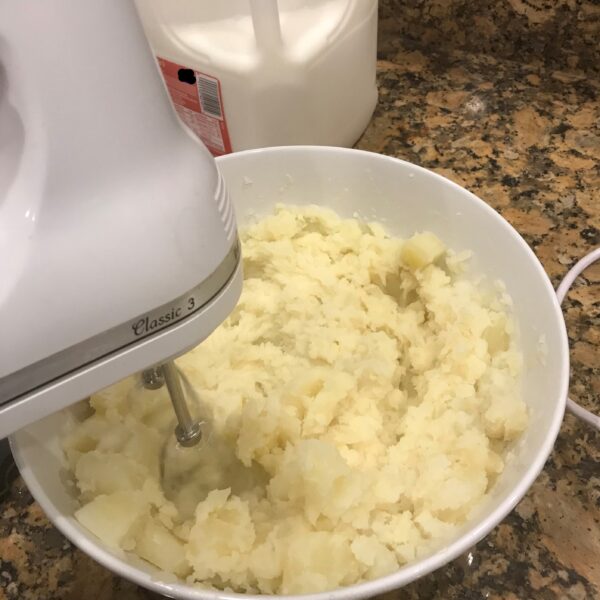
Nothing says comfort food like warm, creamy mashed potatoes. My mom used to always whip them with a hand mixer and that is still my preferred way to eat them.

Course Side Dish
Cuisine American

Prep Time 10 minutes
Cook Time 20 minutes

Servings
people


Ingredients
  • 3 pounds russet potatoes
  • 1/4 cup unsalted butter
  • 3/4 cup milk I use whole
  • 3/4 tsp kosher salt

Course Side Dish
Cuisine American

Prep Time 10 minutes
Cook Time 20 minutes

Servings
people


Ingredients
  • 3 pounds russet potatoes
  • 1/4 cup unsalted butter
  • 3/4 cup milk I use whole
  • 3/4 tsp kosher salt


Instructions
  1. Prepare potatoes by cleaning and peeling them. Cut into 1-1/2" chunks. Place potato chunks into 5 qt pot filled with cold water. Give enough space at the top of the pot to allow for boiling without overflow.

  2. Bring to a boil over high heat. When the water begins to boil, add 3 Tbsp of kosher salt and reduce heat to medium high. Take care to not allow the water to overflow. Boil 10-12 minutes based on the size of your potatoes, stirring occasionally. Drain and place potatoes in a bowl.

  3. Add butter, milk and salt. Beat on low speed with a hand mixer until all ingredients are combined. Turn mixer to high for 30 seconds or until potatoes reach the consistency that you prefer. Serve warm.


Recipe Notes

Starting the potatoes in cold water insures that the potatoes cook evenly.

March 10, 2019 0 comment
0 FacebookTwitterGoogle +Pinterest
  • 1
  • 2
  • 3

Recent Posts

  • Asiago Artisan Bread
  • Potato and Cheese Soup
  • Cheese Drop Biscuits

Archives

  • September 2020
  • November 2019
  • June 2019
  • April 2019
  • March 2019
  • February 2019
  • January 2019
  • December 2018
  • November 2018

About Me

About Me

Writer

My name is Laura White and I'm a momprenuer with a passion for inspiring women and families be their best selves through sharing tips, tricks and incredible products

Keep in touch

Facebook Instagram Pinterest Email

Instagram Corner

No images found!
Try some other hashtag or username

Categories

@2017 - PenciDesign. All Right Reserved. Designed and Developed by PenciDesign


Back To Top